# Flutter Testing Part 2: Widget Tests
This tutorial is a part of the Flutter testing tutorial series. In the [first part](https://blog.shounakmulay.dev/flutter-testing-part-1-unit-tests), you learned about writing unit tests, how to write testable code, and how to write a good unit test.
In this tutorial, you will learn how to test widgets in flutter. We will cover the following topics
- Writing testable widgets
- Types of widget tests.
# Starter Project
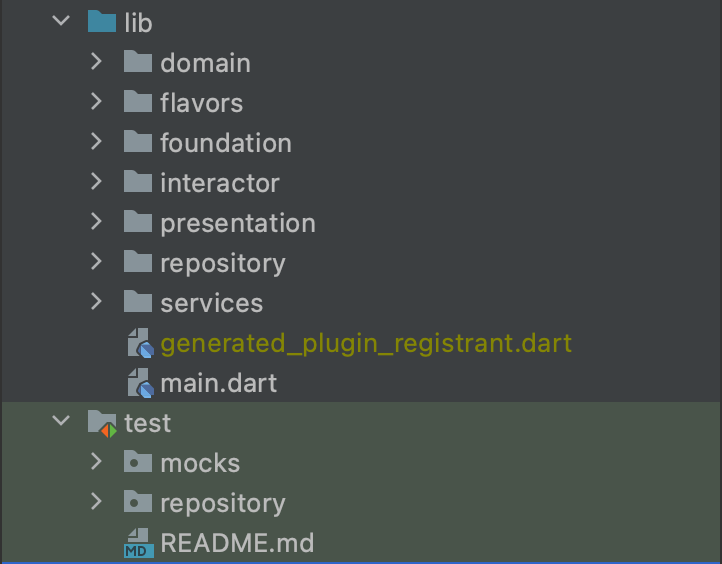
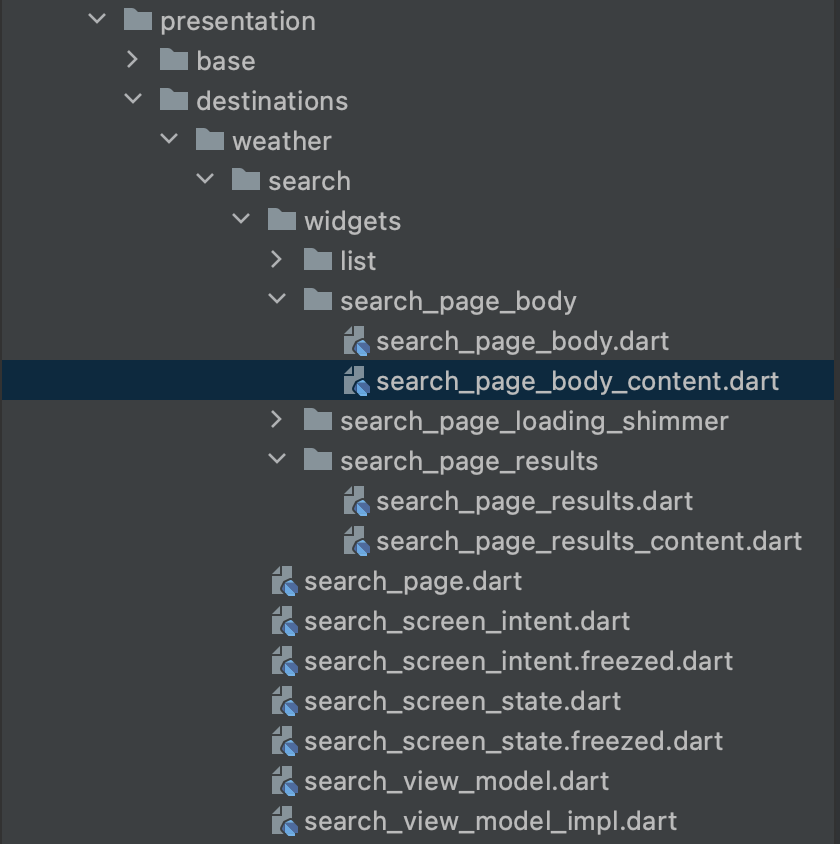
If you haven’t already, clone the starter project from [here](https://github.com/shounakmulay/flutter-testing). Once you clone the project, open it in VS Code or Android studio and checkout the **widget-test-start** branch. You will see the following directory structure.
This branch contains all the changes we made in the [first tutorial](https://blog.shounakmulay.dev/flutter-testing-part-1-unit-tests). We’re going to start where we left of and add widget tests.
# What are widget tests?
Widgets are the basic building blocks of a flutter application. Any screen that you interact with has a widget tree.
A **widget test** is a special type of test that allows us to test widgets in flutter. It takes advantage of the widget tree to run these tests. It creates the tree of widgets without any UI thus saving render time.
Widget tests can be categorised into two categories:
- **Widget Tests**: These tests deal with small individual widgets that don’t have any dependencies. You can think of them as unit testing for widgets.
- **Page / Multi Widget Tests**: These tests deal with testing multiple widgets and their interactions with each other. Like testing the behaviour of a page in the application.
# Writing testable widgets
To write widget tests you need to first write testable widgets. That means the widgets you write shouldn’t have many dependancies, so that you don’t have many mocks.
Usually widgets do a lot of thing other than just create UI. It can listen to state changes, it can create controllers... the works. Here is an example.
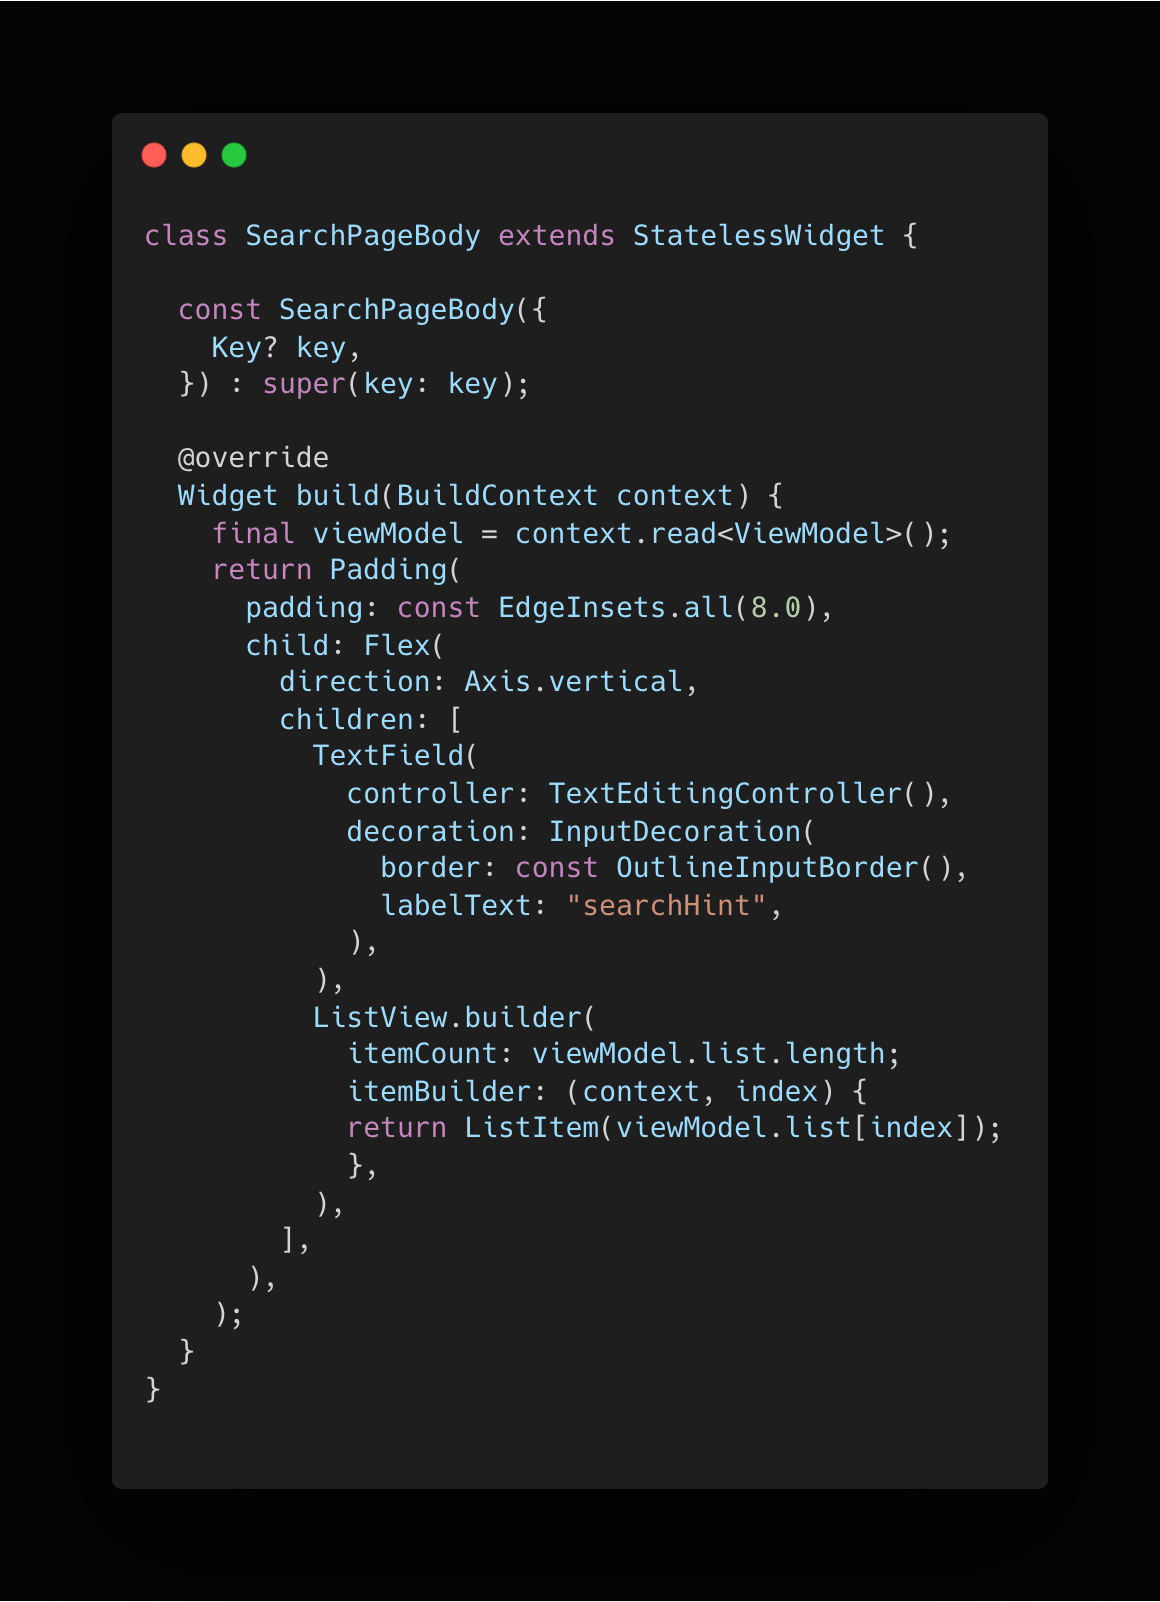
The `SearchPageBody` widget creates a `TextEditingController`, it also accesses the state and uses hard coded strings. All of these make the widget hard to test. Here is why:
- For every test you will need to mock the state.
- The `TextEditingController` is a dependancy which is not in your control.
- You cannot manipulate hard coded text.
To make a widget testable, you should separate it into two parts by using the connector pattern. It breaks down a single widget into two, a **connector widget** and a **content widget**.
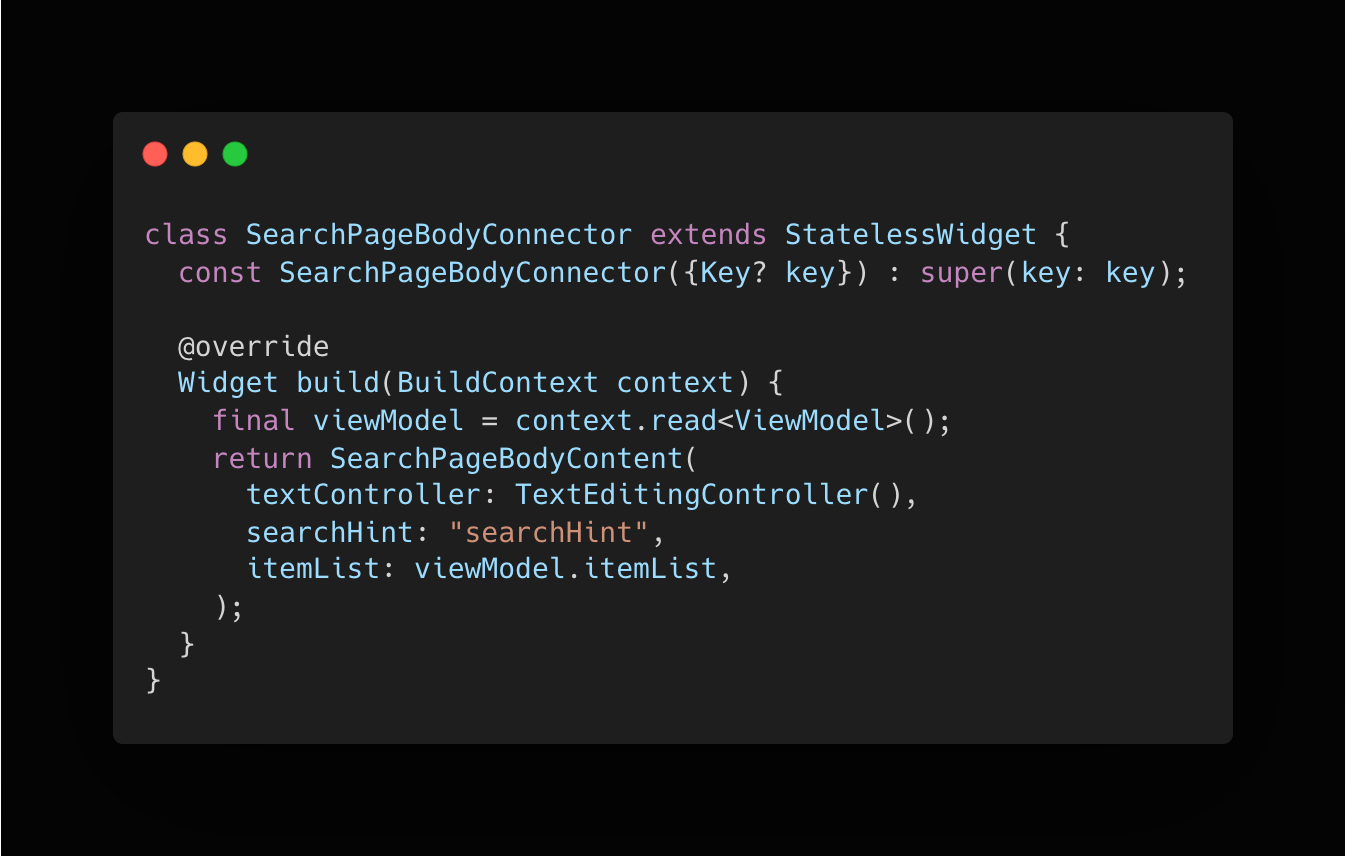
## The Connector Widget
This is the widget that will handle all the dependencies. It will listen to state changes, create required classes, and pass all of this to the content widget. Here is how the connecter widget will look like for the `SearchPageBody` class.
## The Content Widget
This widget receives all the data it needs in its constructor and renders the data.
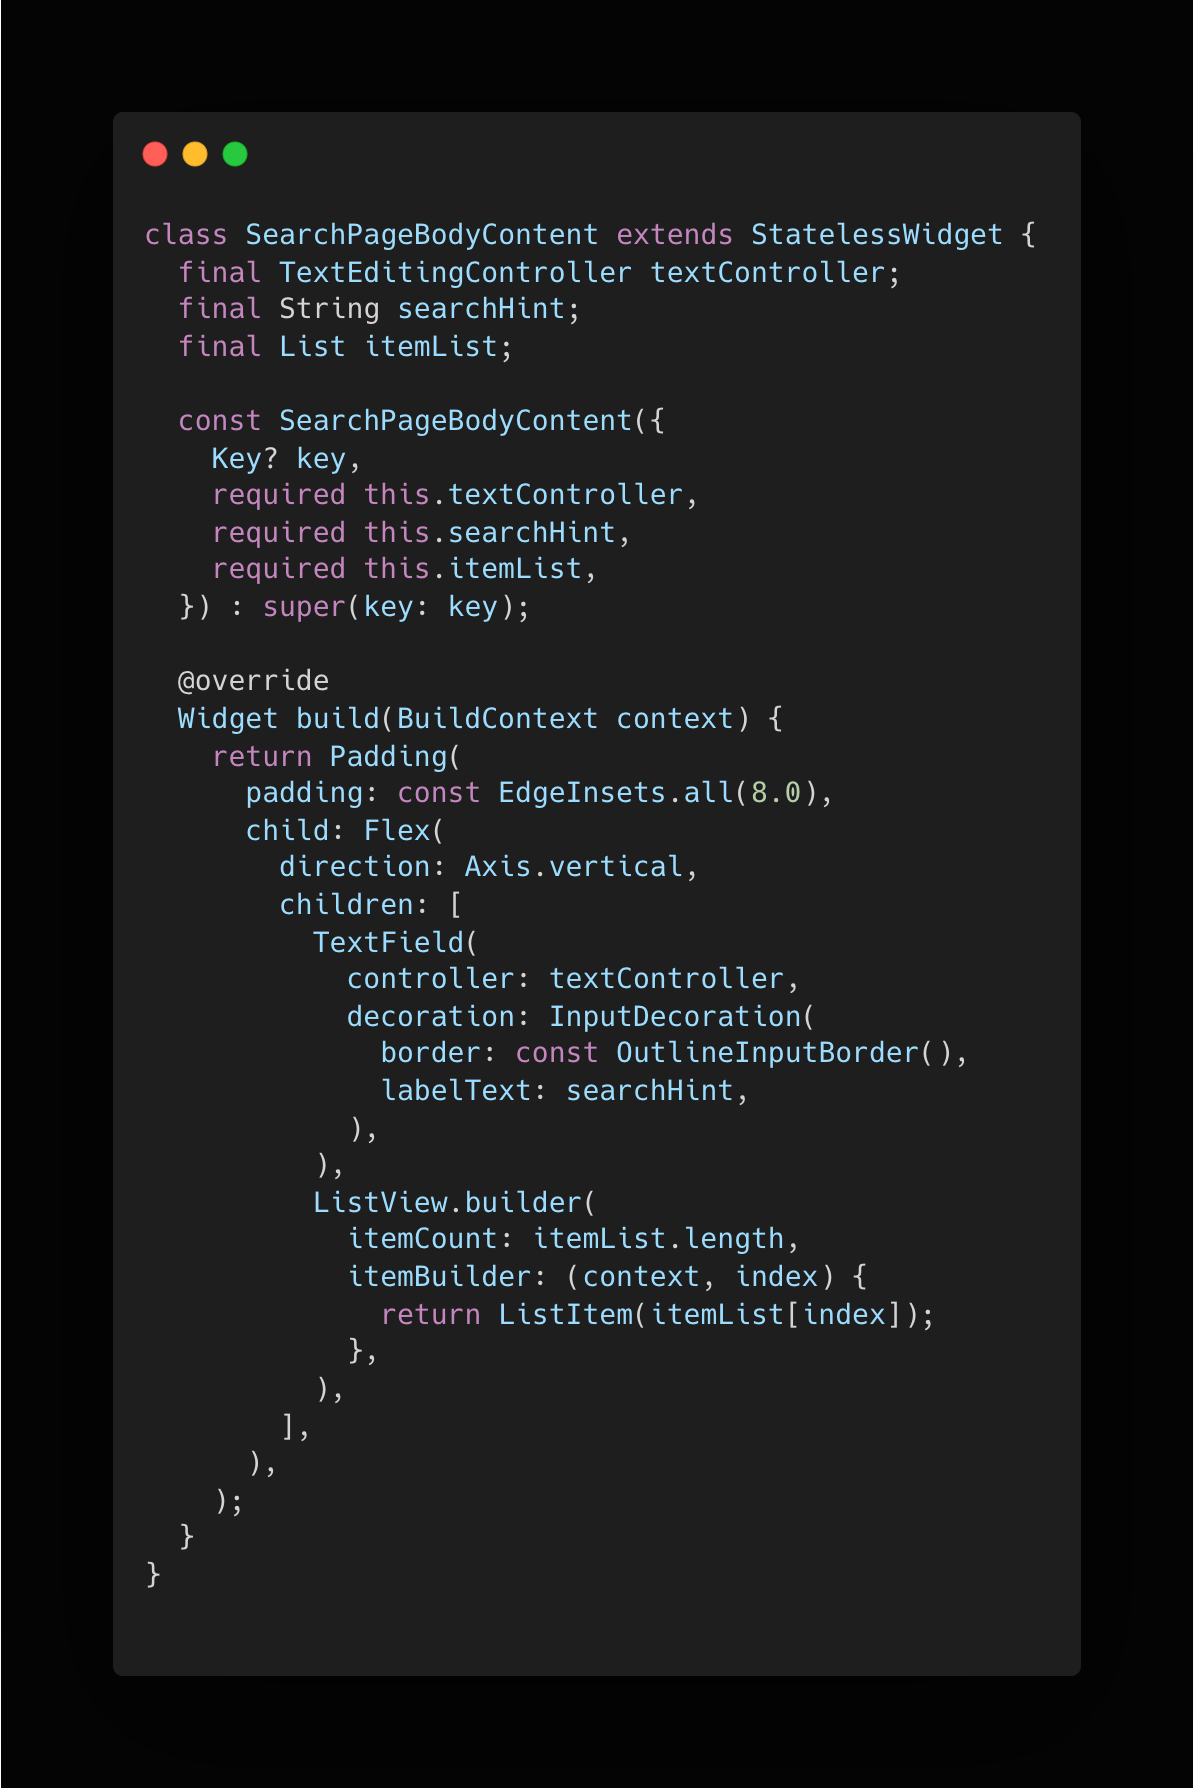
The connector pattern separates the user interface from the rest of the objects. Now you only need to test the content widget. Since everything is passed to this widget you can mock and control all the dependancies.
# Widget test setup
This setup section assumes that you have followed the setup steps in [part 1](https://blog.shounakmulay.dev/flutter-testing-part-1-unit-tests). If not, you can go through the first part of this tutorial series [here](https://blog.shounakmulay.dev/flutter-testing-part-1-unit-tests).
You will write tests for the widgets displayed on **Search** page. These widgets are located in `lib/presentation/destinations` directory.
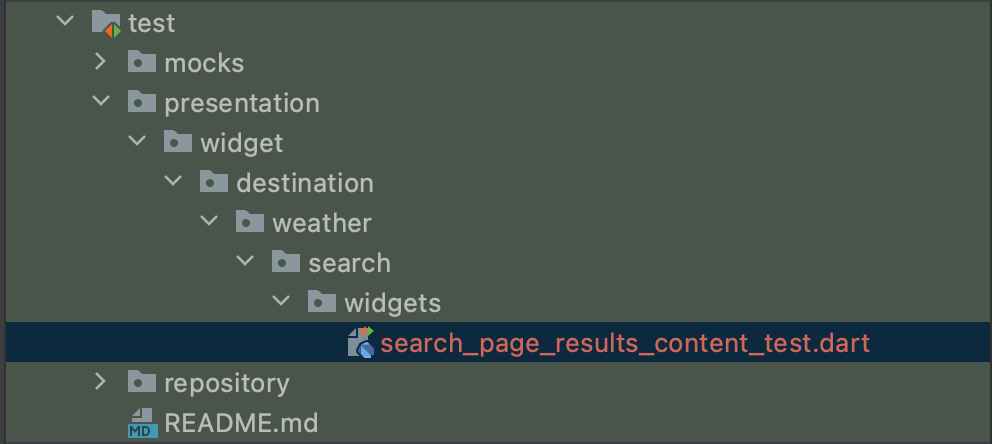
First, let’s write tests for the `SearchPageResultsContent` widget. In the **test** directory, create a new folder named **presentation** and since you are writing a widget test, create a **widget** directory inside.
Next, to make it easier to locate tests for a particular widget later on, you will replicate the original directory structure. Create the `destination/weather/search/widgets` directory and create a new file named `search_page_results_content_test.dart` in it.
The structure of a test file seen in part 1 remains the same for any kind of test. In the newly created test file, add the **main** method along with empty **setUp** and **tearDown** functions for now.
```dart
void main() {
setUp(() {
});
tearDown(() {
});
}
```
It’s important to know all the different states a widget can be in. This helps in writing better tests as you know beforehand what all you need to test.
The `SearchPageResultsContent` widget displays a loading indicator when `showLoading` is set to true and displays a list of data when it is set to false.
Let’s look at the `SearchPageResultsContent` constructor to figure out if we need to create any mocks.
```dart
const SearchPageResultsContent({
Key? key,
required this.showLoading,
required this.searchList,
required this.searchTerm,
required this.intentHandlerCallback,
required this.searchResultsPlaceholder,
required this.noResultsPlaceholder,
}) : super(key: key);
```
Here we would need to mock the `IntentHandle`. In the `mocks.dart` file, add a new mock class.
```dart
// Intent Handler
class MockIntentHandler extends Mock
implements IntentHandler {}
```
Initialise the mock in the test file so that we can use it later when required.
```dart
void main() {
late MockIntentHandler intentHandler;
setUp(() {
intentHandler = MockIntentHandler();
});
tearDown(() {
resetMocktailState();
});
}
```
# Writing widget tests
To create a widget test, you will use the `testWidgets` function from the flutter testing library. You will use the same **Given, When, Then** naming style you used in part 1.
Let’s write a widget test, to test the loading state.
```dart
import 'package:flutter_test/flutter_test.dart';
void main() {
setUp(() {});
tearDown(() {});
testWidgets(
"Given showLoading is false, When results are present, Then results should be displayed",
(WidgetTester tester) async {
// Given
// When
// Then
});
}
```
The `WidgetTester` is a class that allows you to load widgets for testing. It moves the rendering of the widget ahead by a few frames, and lets you interact with them.
Before we load any widget, there are a few things to consider.
- Almost all widgets require a material app and a scaffold to be the parent.
- The specific widget that you are testing, might need some specific parent widgets as well. For e.g. the `SearchPageResultsContent` widget requires a **Flex** widget in the widget tree.
You need to account for all these requirements when you load the widget.
Let’s come back to the `SearchPageResultsContent` widget test. To test the loading indicator you will wrap the widget and pass the needed mocks and parameters as shown below.
```dart
testWidgets(
"Given showLoading is false, When results are present, Then results should be displayed",
(WidgetTester tester) async {
// Given
await tester.pumpWidget(MaterialApp(
home: Scaffold(
body: Flex(
direction: Axis.vertical,
children: [
SearchPageResultsContent(
showLoading: true,
searchList: [],
searchTerm: "",
intentHandlerCallback: (_) {},
searchResultsPlaceholder: "",
noResultsPlaceholder: "")
],
),
),
));
// When
// Then
});
```
Once the widget is loaded, we can interact with it using `WidgetTester`. We can select widgets to perform actions on or verify conditions using the **find** function. Let’s check if the loading widget is displayed as expected.
To do this, we need to expect one widget of type `SearchPageLoadingShimmer` is displayed.
```dart
testWidgets(
"Given showLoading is false, When results are present, Then results should be displayed",
(WidgetTester tester) async {
// Given
...
// When
// Then
expect(find.byType(SearchPageLoadingShimmer), findsOneWidget);
expect(find.byType(Text), findsNothing);
});
```
Here you are searching the widget by its type, but there are many more methods to search a widget by, like `byText` or `byIcon`. You can read more about the finders [here](https://api.flutter.dev/flutter/flutter_test/CommonFinders-class.html). `findsOneWidget` and `findsNothing` are matchers from the test library that verify that one and zero widgets are found by the given finder.
Run the test. You should see results as shown below.

# Extracting common widget setup tests
Writing the `pumpWidget` function on each test is not very efficient. The majority of that function will be the same across various test files. Even in a single test file, there are parts of the widget setup that can be extracted to a common function.
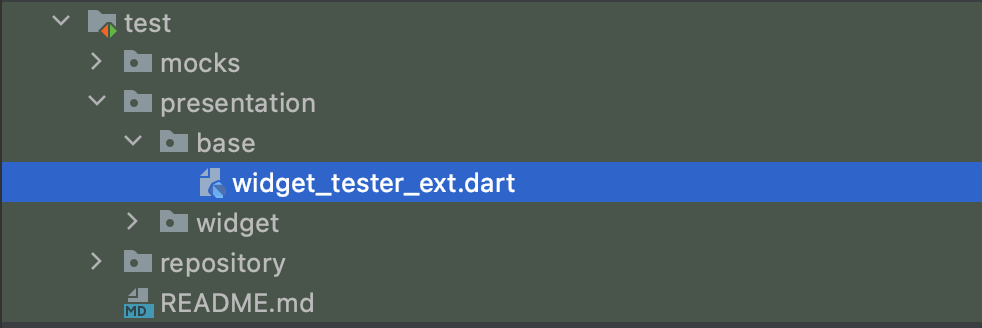
Create a new directory in `test/presentation` named `base`. Create a file named `widget_tester_ext.dart` in this directory.
The common widgets that every widget test file will need are `MaterialApp` and `Scaffold`. Extract the common widgets to an extension function.
```dart
// widget_tester_ext.dart
import 'package:flutter/material.dart';
import 'package:flutter_test/flutter_test.dart';
extension WidgetTesterExt on WidgetTester {
Future loadWidget({
required Widget widget,
}) async {
await pumpWidget(MaterialApp(home: Scaffold(body: widget)));
}
}
```
With that in place, each widget test file can have a common `loadWidget` function that can extract any common widget specific setup. Open the `search_page_results_content_test.dart` file and add the following function.
```dart
_loadWidget(WidgetTester tester, SearchPageResultsContent widget) async {
await tester.loadWidget(
widget: Flex(
direction: Axis.vertical,
children: [
widget,
],
),
);
}
```
Here you will extract the setup of **Flex** to the common function. Now you can replace the `pumpWidget` function with our custom helper method in the test.
```dart
testWidgets(
"Given showLoading is false, When results are present, Then results should be displayed",
(WidgetTester tester) async {
// Given
await _loadWidget(
tester,
SearchPageResultsContent(
showLoading: true,
searchList: [],
searchTerm: "",
intentHandlerCallback: (_) {},
searchResultsPlaceholder: "",
noResultsPlaceholder: "",
),
);
// When
// Then
expect(find.byType(SearchPageLoadingShimmer), findsOneWidget);
expect(find.byType(Text), findsNothing);
});
```
# Interactions in widget test
Widgets react to some sort of user interaction. It might be typing some text, or tapping on an icon. You should be able to mimic the interactions in a widget test as well. To do that you can use the `WidgetTester`.
Add the following test to the `search_page_results_content_test.dart` file.
```dart
testWidgets(
"Given search list is not empty, When favorite icon is tapped, Then intent handler callback is called with correct intent",
(tester) async {
// Given
final uiCity = UICity(
cityId: 1,
title: "title",
locationType: "locationType",
location: "location",
isFavourite: false,
);
final searchList = [
uiCity,
uiCity.copyWith(cityId: 2, title: "title 2", isFavourite: true),
];
await _loadWidget(
tester,
SearchPageResultsContent(
showLoading: false,
searchList: searchList,
searchTerm: "searchTerm",
intentHandlerCallback: intentHandler.onIntent,
searchResultsPlaceholder: "",
noResultsPlaceholder: "",
),
);
// When
// Then
});
```
Here you are using the mock intent handler created in the setup process. You pass the `onIntent` function reference to the `intentHandlerCallback` parameter of the widget.
Add the code to tap on the favourite icon. You can do that by using the **tap** method on `WidgetTester`. You can learn more about all the available methods [here](https://api.flutter.dev/flutter/flutter_test/WidgetTester-class.html).
```dart
testWidgets(
"Given search list is not empty, When favorite icon is tapped, Then intent handler callback is called with correct intent",
(tester) async {
// Given
...
// When
await tester.tap(find.byIcon(Icons.favorite_border));
await tester.pumpAndSettle();
// Then
});
```
The`pumpAndSettle` method advances rendering by multiple frames until nothing is changing on the screen. This is helpful if there could be some animation involved in changing the UI.
Next, verify that the correct function call was made in response to the tap with the correct data.
```dart
testWidgets(
"Given search list is not empty, When favorite icon is tapped, Then intent handler callback is called with correct intent",
(tester) async {
// Given
...
// When
...
// Then
verify(
() => intentHandler.onIntent(
SearchScreenIntent.toggleFavorite(
city: searchList.first,
),
),
).called(1);
});
```
Run the test. You should see the results as shown below.

# Page / Multi Widget Tests
These tests are similar to widget test, but have a wider scope of testing. Instead of testing individual widgets, here you will be testing a group of widgets or the entire page. Going forward we will refer to these tests as **Page tests.**
In page tests, you want to mimic real app behaviour as closely as possible. Here you will interact with your UI and expect certain results in response to those interactions.
The two main differences in integration test from widget tests are:
- **State Management mocking setup:** Similar to widget tests, you cannot avoid the state management entirely. The page widgets will usually directly deal with some state management logic. Depending on the state management that you use in your application the methods to mock or replace it in tests will differ. Looking into the docs of the state management library for details is a good start.
- **The pumpWidget setup**: Similar to a widget test. Page tests will also benefit from a custom helper function that extracts all the common **pumpWidget** logic. For widget tests, the setup was trivial, but for page tests, you need a lot more. Some of these will include your localisation library, global wrapper widget for you state management library, etc. This setup is also very subjective to your application. You need to make sure you provide all the parent widgets required for your page to function correctly.
Apart from these two differences, a page test is not different than a widget test.
Check out the [**search_page_test.dart**](https://github.com/wednesday-solutions/flutter_template/blob/main/test/presentation/integration/destinations/weather/search/search_page_test.dart) on the **Flutter Template** for an example of integration test.
# Advantages and Disadvantages of Widget Tests
Widget and Page tests are very quick to execute since it does not actually render UI to any screen. You can easily test interactions and their side effects on widgets and pages.
The major disadvantage of these tests is that they cannot safeguard you from UI position changes. For example, if the position of the favourite icon on the list item changes, this test will still pass.
These tests also cannot easily test if your widgets and pages look good across a variety of resolutions. With the number of platforms flutter can target increasing continuously, this becomes even more important.
We will look at how can we write tests that verify the appearance of the widgets and pages in the upcoming part in this tutorial series.
# Where to go from here?
You are now able to test your widgets and pages! Try writing more widget and integration test with the concepts you learned. Try to apply them to your projects. To get the complete code from this tutorial, checkout the [**widget-test-end**](https://github.com/shounakmulay/flutter-testing/tree/widget-test-end) branch.
If you want to look at a working example, checkout the widget and integration tests in the [flutter template](https://github.com/wednesday-solutions/flutter_template).
In the next part, we will look at tests that can verify the appearance of your UI.
We’d love to hear back from you with your learnings on the topic. Join the conversation and leave a like if you found this helpful.